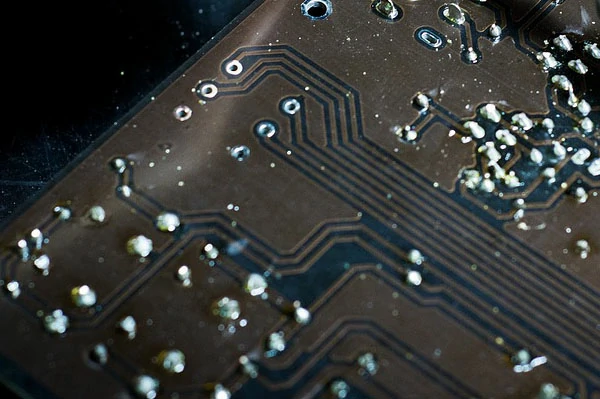
Soldering is a crucial skill for electronics enthusiasts, DIY hobbyists, and professionals alike. Whether you are assembling a circuit board or working on a DIY project, the quality of your solder joints can significantly impact the overall functionality and reliability of your work. One common issue that can plague soldering projects is the creation of cold solder joints. In this article, we'll delve into what cold solder joints are, why they occur, and how to avoid making them.

Cold solder joints, also known as "dry joints," are problematic solder connections that occur when the solder didn't properly flow and adhere to the components being joined. These joints can lead to electrical problems, poor connectivity, and even physical damage in some cases. They are usually characterized by a dull, grainy, or crystalline appearance, as opposed to a smooth, shiny, and consistent solder connection.
Proper Heating and Temperature Control:
Achieving the correct soldering temperature is paramount. Ensure your soldering iron is set to the appropriate temperature for your specific solder and components. Most soldering kit come with temperature control settings, so be sure to adjust it accordingly.
Cleanliness is Key:
Always clean the components and the soldering iron tip. Oxidized or dirty surfaces can inhibit the flow of solder and lead to cold joints. Use a damp sponge or brass wire tip cleaner to keep your iron tip clean.
Use the Right Solder:
Make sure you're using the right type and diameter of solder for your project. Different projects require different solder types, so choose accordingly. Generally, lead-based solder is easier to work with, but if you prefer lead-free options, ensure you have the right flux and temperature settings.
Flux Application:
Applying flux to the components before soldering can improve solder flow and prevent cold joints. Flux helps remove oxidation, ensuring a strong and reliable connection.
Proper Technique:
When soldering, make sure to heat the component and the solder, not the soldering iron itself. Touch the solder to the joint, not the iron, and wait until it flows and covers the entire connection. Remove the iron only after the solder has completely melted and adhered.
Avoid Overheating:
Overheating can cause thermal damage to components and create cold joints. Be mindful of how long you apply heat and keep it to a minimum.
Inspect Your Work:
After soldering, inspect your joints carefully. Look for any signs of dull, grainy appearances. If you find cold joints, rework them by melting the solder and letting it flow properly.
Q1: Can I fix cold solder joints?
A1: Yes, you can fix cold solder joints by reworking them. Reheat the joint to ensure the solder flows and adheres properly. Be cautious not to overheat and damage the components.
Q2: What causes cold solder joints?
A2: Cold solder joints can be caused by inadequate heating, dirty or oxidized surfaces, the wrong type of solder, or poor technique.
Q3: Can I use a soldering kit to prevent cold solder joints?
A3: Using a quality soldering kit can help you avoid cold solder joints by providing precise temperature control and clean soldering iron tips.
Q4: Is there a difference between lead-based and lead-free solder when it comes to cold solder joints?
A4: While both can lead to cold solder joints if used incorrectly, lead-based solder is generally easier to work with due to its lower melting point.
Q5: Are cold solder joints dangerous?
A5: Cold solder joints can cause electrical problems, unreliable connections, and potentially damage components, making them a concern in any soldering project.
In conclusion, creating strong and reliable solder joints is essential for any soldering project. Cold solder joints can be frustrating and lead to numerous issues, but by following the tips mentioned above and being attentive to your technique, you can avoid their formation. Remember to inspect your work and rework any problematic joints to ensure your projects function correctly.
 WhatsApp