
Soldering in PCB refers to the process of joining electronic components to the PCB to establish electrical connections. It involves melting solder, a metal alloy with a low melting point, to create a bond between the component leads and the copper pads on the PCB. This article will discuss how to solder wires to the PCB. The right equipment for PCB soldering and the steps required for the process.
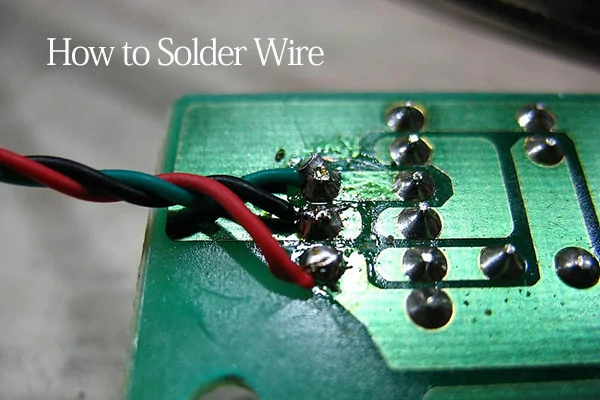
Soldering wires to a Printed Circuit Board (PCB) involves the process of joining electrical wires to the copper pads on the PCB to establish electrical connections. This is a common practice in electronics and is used to integrate various components and create functional circuits.
Soldering is a crucial skill for assembling electronic circuits on a circuit board. There are two main types of soldering processes: soft soldering and hard soldering.
Soft Soldering:
Soft soldering is ideal for fastening small elements onto the printed circuit board (PCB). This process involves attaching low-temperature elements to the PCB using a tin-lead alloy. The alloy acts as both a spacer and an adhesive between the element and the circuit board. A gas torch is used as the heat source, causing the alloy to melt and create a strong bond.
Hard Soldering:
Hard soldering employs solid solders to connect two different metallic components. It covers the holes of unfastened elements due to high heat. Hard soldering includes two processes: silver soldering and brazing soldering. The melting point of the space cover metal in hard soldering is as high as 450⁰C.
This process is used to refine small elements and perform intricate fixes on the circuit board.
Brazing soldering is a method of joining two ends on the base metal. The liquid filler, often brass, helps unite the two ends through nuclear attraction and dispersion. This produces a very durable joint that connects the terminals securely.
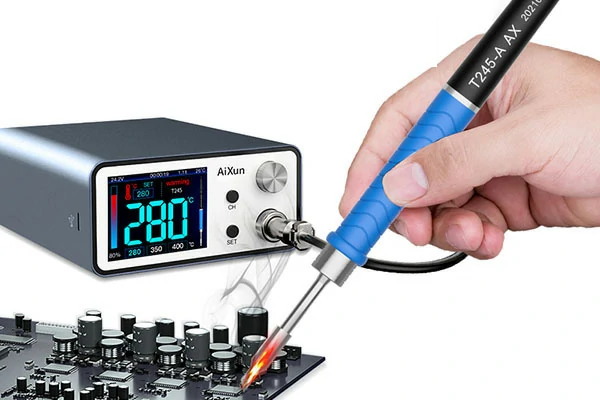
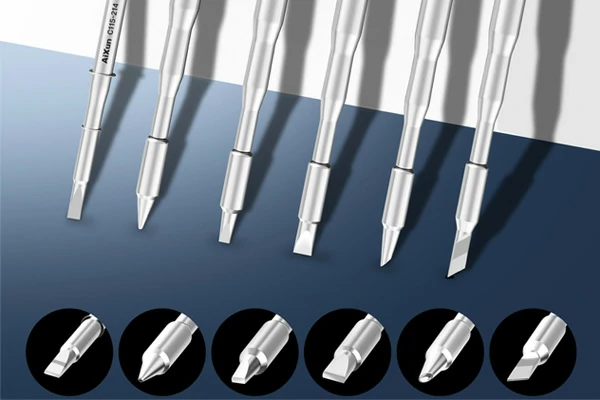
To begin your soldering journey, gather the essential tools and materials. A reliable soldering station with adjustable temperature settings is crucial for precision. Choose solder wire with a suitable diameter for your project, and don't forget flux to promote better solder flow and adhesion. Select a PCB board that matches your project's requirements, ensuring it is clean and free of dust or contaminants.
Before soldering, cleanliness is key. Use isopropyl alcohol and a small brush to clean the PCB thoroughly. Similarly, clean the wire ends to remove any insulation or oxidation. Once clean, apply a thin layer of solder to the wire and PCB pads, a process known as tinning. Tinning ensures better conductivity and promotes a stronger bond between the wire and the board.
1. Heat the Soldering Iron: Allow the soldering iron to reach the appropriate temperature, typically between 300-400 degrees Celsius.
2. Tin the Soldering Iron Tip: Apply a small amount of solder to the iron tip to enhance heat transfer.
3. Position the Components: Hold the tinned wire against the tinned PCB pad and apply the heated soldering iron to the joint.
4. Apply Solder: Introduce solder to the joint, allowing it to melt and flow evenly. Ensure a smooth, shiny solder joint without any dull spots.
Repeat these steps for all connections, being mindful not to overheat the components, as excessive heat can damage the PCB or connected devices.
Even with careful execution, issues may arise. Here are some common problems and solutions:
1. Cold Joints: If your solder joint looks dull or grainy, it may be a cold joint. Reheat the joint and add a bit more solder to achieve a smooth, shiny finish.
2. Solder Bridges: Occur when solder connects two adjacent pads. Use desoldering wick or a solder sucker to remove excess solder and separate the connections.
3. Overheating: Excessive heat can damage components. Practice good soldering habits, such as not applying heat for too long and allowing components to cool between soldering.
1. Ventilation: Work in a well-ventilated area or use a fume extractor to avoid inhaling harmful solder fumes.
2. Eye Protection: Wear safety glasses to protect your eyes from solder splatter and potential damage.
3. Handling the Soldering Iron: Always hold the iron by the handle, and use a soldering iron stand when not in use. Avoid touching the hot tip.
4. Workspace Organization: Keep your workspace tidy to prevent accidents and ensure a smooth soldering process.
You've now navigated the intricacies of soldering wires to a PCB board. Remember, practice is key to mastering this skill. As you embark on your soldering projects, continue refining your technique and troubleshooting skills.
AiXun, a leading manufacturer and supplier in China, is your one-stop solution for a spectrum of technological needs. Specializing in intelligent software and hardware development, material analysis, mobile phone maintenance, and precision circuit board soldering ect.
For inquiries or partnership opportunities, please contact AiXun
 WhatsApp